SpringMVC
1三层架构和MVC
1.1三层架构
1.2MVC
MVC全名是Model View Controller
模型视图控制器,每个部分各司其职。
Model:数据模型,JavaBean的类,用来进行数据封装。
View:指JSP、HTML用来展示数据给用户
Controller:用来接收用户的请求,整个流程的控制器。用来进行数据校验等。
1.3配置
1
2
3
4
5
6
7
8
9
10
11
12
13
14
15
16
17
18
19
20
21
22
23
| <!DOCTYPE web-app PUBLIC
"-//Sun Microsystems, Inc.//DTD Web Application 2.3//EN"
"http://java.sun.com/dtd/web-app_2_3.dtd" >
<web-app>
<display-name>Archetype Created Web Application</display-name>
<servlet>
<servlet-name>dispatcherServlet</servlet-name>
<servlet-class>org.springframework.web.servlet.DispatcherServlet</servlet-class>
<init-param>
<param-name>contextConfigLocation</param-name>
<param-value>classpath:springmvc.xml</param-value>
</init-param>
<load-on-startup>1</load-on-startup>
</servlet>
<servlet-mapping>
<servlet-name>dispatcherServlet</servlet-name>
<url-pattern>/</url-pattern>
</servlet-mapping>
</web-app>
|
- springmvc.xml(resources下)
1
2
3
4
5
6
7
8
9
10
11
12
13
14
15
16
17
18
19
20
21
22
23
24
25
26
| <?xml version="1.0" encoding="UTF-8"?>
<beans xmlns="http://www.springframework.org/schema/beans"
xmlns:mvc="http://www.springframework.org/schema/mvc"
xmlns:context="http://www.springframework.org/schema/context"
xmlns:xsi="http://www.w3.org/2001/XMLSchema-instance"
xsi:schemaLocation="
http://www.springframework.org/schema/beans
http://www.springframework.org/schema/beans/spring-beans.xsd
http://www.springframework.org/schema/mvc
http://www.springframework.org/schema/mvc/spring-mvc.xsd
http://www.springframework.org/schema/context
http://www.springframework.org/schema/context/spring-context.xsd">
<context:component-scan base-package="com.fyw"></context:component-scan>
<bean id="internalResourceViewResolver" class="org.springframework.web.servlet.view.InternalResourceViewResolver">
<property name="prefix" value="/WEB-INF/pages/"></property>
<property name="suffix" value=".jsp"></property>
</bean>
<mvc:annotation-driven></mvc:annotation-driven>
</beans>
|
|
@Controller
public class HelloController {
@RequestMapping(path = "/hello")
public String sayHello(){
System.out.println("Hello");
return "success";
}
}
|
1.4组件介绍
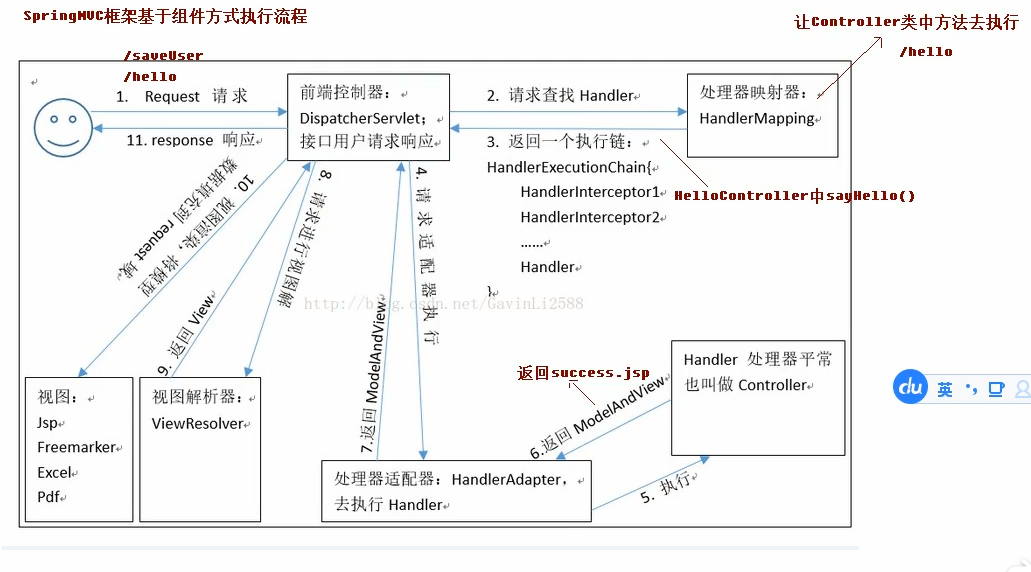 image-20200502094226341
- DispatcherServlet:前端控制器
- 用户请求到达前端控制器,它就相当于mvc模式中的C,dispatcherServlet
是整个流程控制的中心,由
它调用其它组件处理用户的请求,dispatcherServlet的存在降低了组件之间的耦合性。
- HandlerMapping:处理器映射器
- HandlerMapping负责根据用户请求找到Handler即处理器,SpringMVC提供了不同的映射器实现不同的
映射方式,例如:配置文件方式,实现接口方式,注解方式等。
- Handler:处理器
- 它就是我们开发中要编写的具体业务控制器。由DispatcherServlet
把用户请求转发到Handler。由 Handler对具体的用户请求进行处理。
- HandlerAdapter:处理器适配器(返回指定为success.jsp,但未进行生成)
- 不管送过来的什么类型处理器,经过适配器转换后执行Handler
- ViewResolver:视图解析器(即生成success.jsp)
- View Resolver负责将处理结果生成View视图,View
Resolver 首先根据逻辑视图名解析成物理视图名
即具体的页面地址,再生成View视图对象,最后对View进行渲染将处理结果通过页面展示给用户。
1.5RequestMapping注解
作用:建立请求URL与请求处理方法之间的关系
可以作用在类上方法上
- 注意:同时作用在类和其方法上时,href要加上类/方法
如方法mapping为hello,类mapping为user。则需要写/user/hello
1.5.1RequestMapping属性
path与value相同
method:限定方法与什么样的请求方式所请求
| @Controller
public class HelloController {
@RequestMapping(path = "/hello",method = {RequestMethod.POST})
public String sayHello(){
System.out.println("Hello");
return "success";
}
}
|
指定方法必须以post方法请求时才会响应
超链接默认为get,会出现405报错
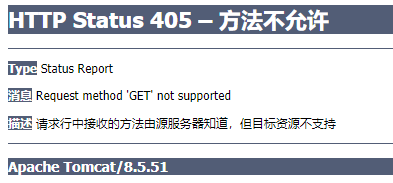 image-20200502100234531
 枚举类
枚举类
params:指定调用方法必须要传入的参数
- ```java @RequestMapping(path =
"/hello",params = {"username"})
|
必须要传入username参数才可以执行,<a href=“/hello?username=hh”></a>
- headers:指定请求头
# 2.请求参数的绑定
## 2.1入门案例
```jsp
<a href="/param/testParam?username=hehe">参数绑定</a>
|
| @RequestMapping("/param")
public class ParamController {
@RequestMapping("testParam")
public String testParam(String username){
System.out.println("参数绑定");
System.out.println("用户名:" +username);
return "success";
}
|
自动将username=hehe赋值给了username
2.2封装实体类
| <form method="post" action="param/saveAccount">
姓名:<input type="text" name="username"><br>
密码:<input type="text" name="password"><br>
金额:<input type="text" name="money"><br>
用户姓名:<input type="text" name="user.uname"><br> !!!另一个实体类
用户年龄:<input type="text" name="user.age"><br>
<input type="submit" value="提交"><br>
</form>
|
| @RequestMapping("saveAccount")
public String testParam(Account account) { !!!自动按照name给account属性赋值
System.out.println("参数绑定");
System.out.println(account.toString());
return "success";
}
|
结果:
解决post中文乱码:
|
<filter>
<filter-name>characterEncodingFilter</filter-name>
<filter-class>org.springframework.web.filter.CharacterEncodingFilter</filter-class>
<init-param>
<param-name>encoding</param-name>
<param-value>UTF-8</param-value>
</init-param>
</filter>
<filter-mapping>
<filter-name>characterEncodingFilter</filter-name>
<url-pattern>/*</url-pattern>
</filter-mapping>
|
2.2.1类型转换
1
2
3
4
5
6
7
8
9
10
11
12
13
14
15
16
17
18
19
20
21
22
23
| import org.springframework.core.convert.converter.Converter; !!!注意包的名称,cglib也有
import javax.xml.crypto.Data;
import java.text.ParseException;
import java.text.SimpleDateFormat;
import java.util.Date;
public class StringToDateConverter implements Converter<String,Date> {
@Override
public Date convert(String s) {
try {
SimpleDateFormat date =new SimpleDateFormat("yyyy-MM-dd");
date.parse(s);
} catch (ParseException e) {
throw new RuntimeException("数据类型转换异常");
}
return null;
}
}
|
配置springmvc.xml
|
<bean id="conversionService" class="org.springframework.context.support.ConversionServiceFactoryBean">
<property name="converters">
<set>
<bean class="com.fyw.utils.StringToDateConverter"></bean>
</set>
</property>
</bean>
<mvc:annotation-driven conversion-service="conversionService"></mvc:annotation-driven>
</beans>
|
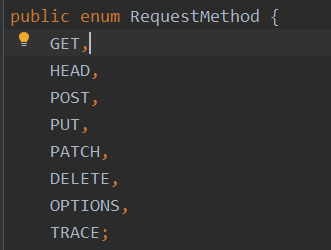
2.2.2Servlet原生API
| @RequestMapping("testServlet")
public String testServlet(HttpServletRequest request, HttpServletResponse response) {
System.out.println("Servlet");
System.out.println(request);
HttpSession session = request.getSession();
System.out.println(session);
ServletContext servletContext = session.getServletContext();
System.out.println(servletContext);
System.out.println(response);
return "success";
}
|
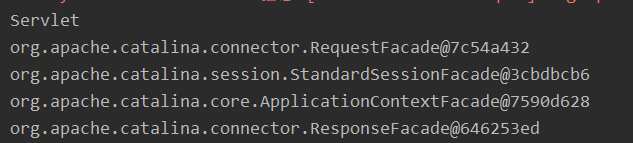 image-20200502153850502
2.2.3RequestParam注解
| @RequestMapping("/testRequestParam")
public String testRequestParams(@RequestParam("name") String username){
System.out.println(username);
return "success";
}
|
用于指定参数接受的名称,指定后前端参数名只能为name
2.2.4RequestBody注解
- 用于获取请求体内容,直接使用得到的是key=value&key=value形式
- get请求方式不适用
2.2.3 REST风格URL
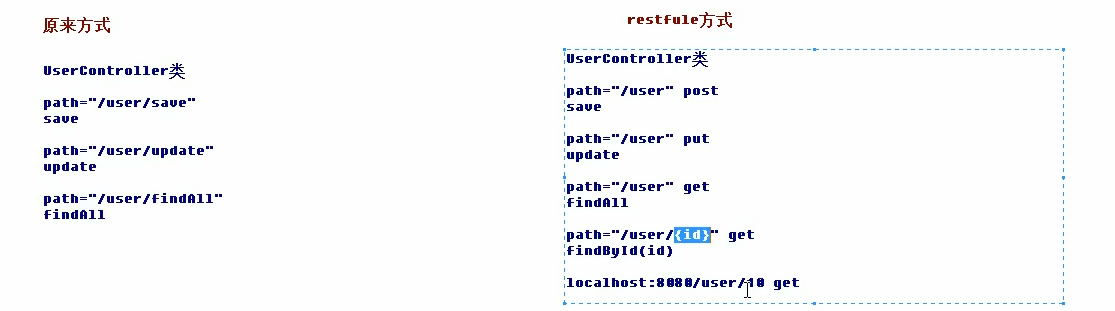 image-20200502171231116
2.2.4 PathVariable注解
| @RequestMapping("/testPathVariable/{sid}")
public String testPathVariable(@PathVariable(name = "sid") String id){
System.out.println(id); =10
return "success";
}
|
| <a href="/anno/testPathVariable/10">Path.jsp</a>
|
用于获取请求头信息
 image-20200502172607125
2.2.6CookieValue注解
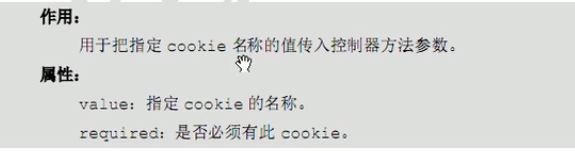 image-20200502172802806
2.2.7ModelAttribute注解
2.2.8SessionAttribute注解
1
2
3
4
5
6
7
8
9
10
11
12
13
14
15
16
17
18
19
20
21
22
23
24
25
26
27
28
29
30
31
32
33
34
| @RequestMapping("/testSessionAttributes")
public String testSessionAttributes(Model model){
model.addAttribute("msg","oo");
return "success";
}
}
@RequestMapping("/getSessionAttributes")
public String getSessionAttributes(ModelMap modelMap){
String msg = (String) modelMap.get("msg");
System.out.println(msg);
return "success";
}
@RequestMapping("/deleteSessionAttributes")
public String deleteSessionAttributes(SessionStatus status){
status.setComplete();
return "success";
}
|
| <%@ page contentType="text/html;charset=UTF-8" language="java" isELIgnored="false" %>
${requestScope} --EL表达式
|
结果:
@sessionAttributes(value=“msg”)在类方法上时;把msg=oo存入到session域中,
3.响应数据和结果视图
3.1响应ajax请求的json数据
| <dependency>
<groupId>com.fasterxml.jackson.core</groupId>
<artifactId>jackson-databind</artifactId>
<version>2.9.8</version>
</dependency>
<dependency>
<groupId>com.fasterxml.jackson.core</groupId>
<artifactId>jackson-core</artifactId>
<version>2.9.8</version>
</dependency>
<dependency>
<groupId>com.fasterxml.jackson.core</groupId>
<artifactId>jackson-annotations</artifactId>
<version>2.9.8</version>
</dependency>
|
1
2
3
4
5
6
7
8
9
10
11
12
13
14
15
16
17
18
19
20
| <script src="js/jquery.min.js"></script>
<script>
$(function () {
$("#btn").click(function () {
$.ajax({
url:"user/testAjax",
contentType:"application/json;charset=UTF-8",
data:'{"uname":"haha",age:20}',
dataType:"json",
type:"post",
success:function (data) {
}
})
});
});
|
| 客户端发送ajax请求,传的是json字符串,后端把json字符串封装到对象中
|
1
2
3
4
5
6
7
8
9
10
11
12
13
14
15
16
17
18
19
20
21
| <script>
$(function () {
$("#btn").click(function () {
$.ajax({
url:"user/testAjax",
contentType:"application/json;charset=UTF-8",
data:'{"uname":"haha","age":"20"}', !!客户端发回后台的数据
dataType:"json",
type:"post",
success:function (data) {
alert(data);
alert(data.uname); !!客户端显示后台发来的数据
}
})
});
});
</script>
|
|
@RequestMapping("/testAjax")
public @ResponseBody User testAjax(@RequestBody User user){
System.out.println("测试ajax");
System.out.println(user);
user.setUname("哈喽");
user.setAge(19);
return user; !!将新设置的user传回客户端
}
}
|
4.异常处理
4.1异常拦截器
4.1.2拦截器和过滤器的区别
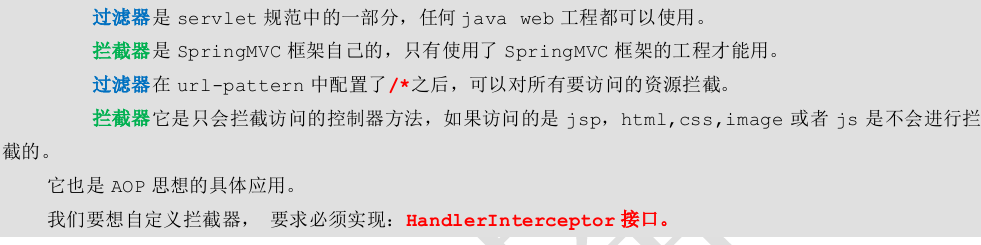 image-20200511085526541